Perm Rod Set
FAQs:
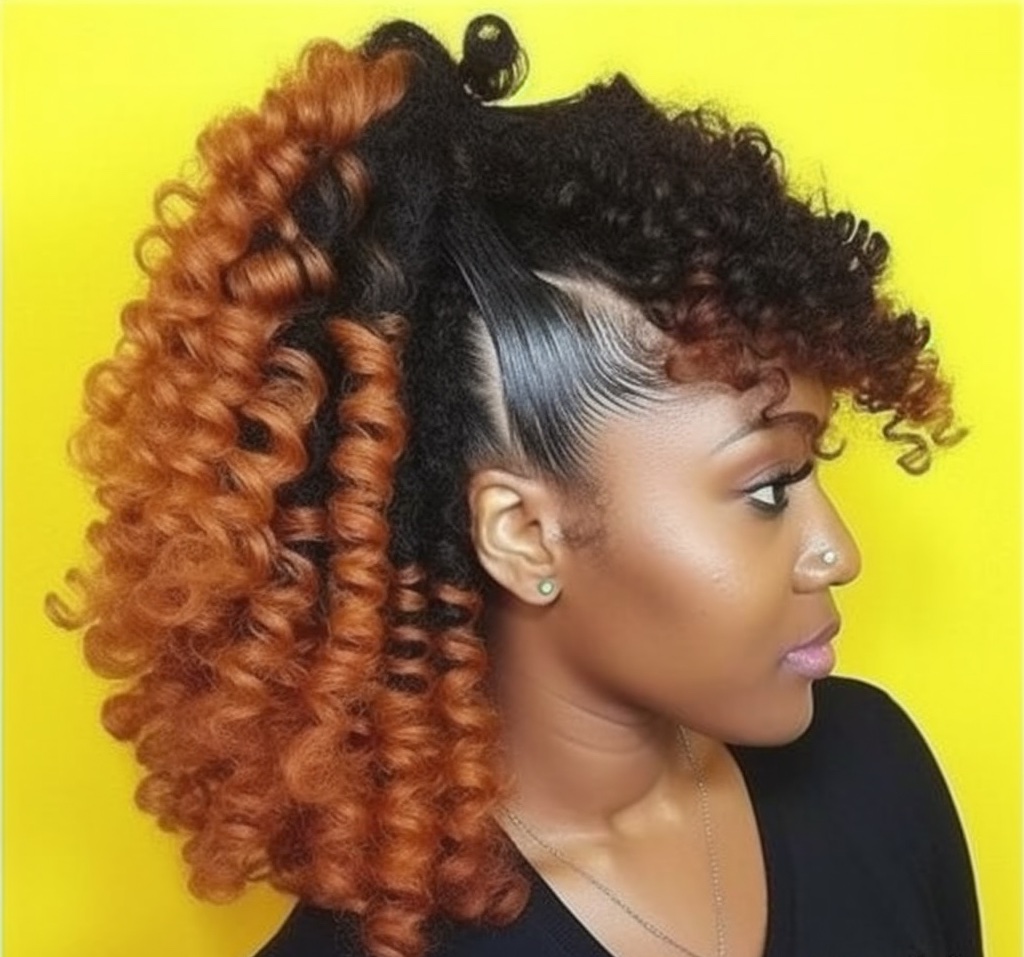
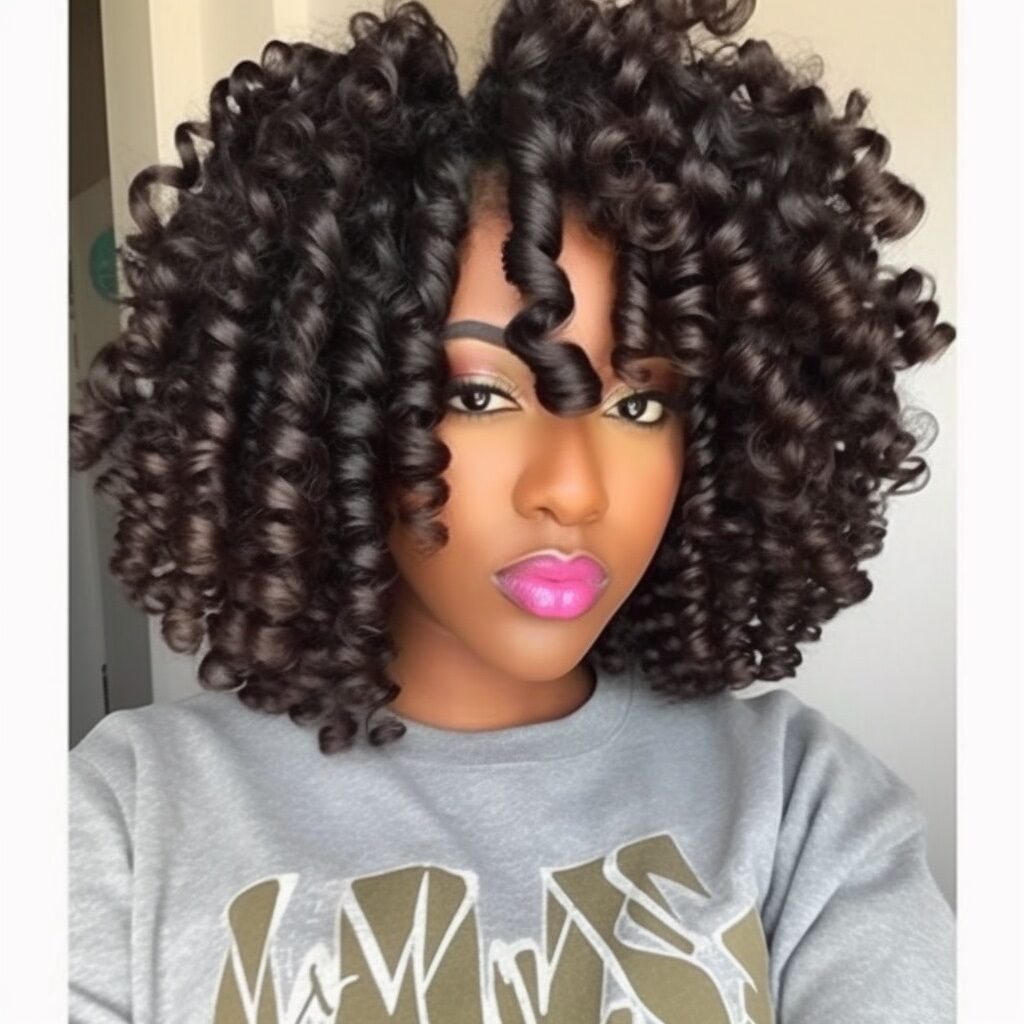
What is a Perm Rod Set?
A perm rod set is a hairstyling technique that creates defined and long-lasting curls using perm rods. It is a popular method for achieving bouncy and voluminous curls or waves without the need for heat styling tools. The process involves wrapping sections of damp hair around perm rods and allowing them to set and dry, resulting in beautifully styled curls.
Can anyone achieve a perm rod set?
Yes, a perm rod set can be done on various hair types and lengths. It works well on natural hair, relaxed hair, and even hair extensions. However, the results may vary depending on the texture and thickness of the hair.
How long does a perm rod set last?
A perm rod set can last anywhere from a few days to a week or more, depending on how well you maintain it. To extend the longevity of the style, it’s important to protect your hair while sleeping, avoid excessive manipulation, and use products that help preserve the curls.
Can I use different sizes of perm rods for a more textured look?
Absolutely! Mixing different sizes of perm rods can add dimension and texture to your curls. You can use smaller rods for tighter curls and larger rods for looser waves. Experiment with different rod sizes to create a customized look that suits your preferences.
The perm rod set technique has been used for many decades to create beautiful curls and waves. It gained popularity in the mid-20th century as a way to achieve long-lasting curls without the use of heat. Over the years, the technique has evolved, and today it remains a popular choice for those seeking versatile and natural-looking curls.
Products Needed:
- Wide-tooth comb or detangling brush
- Curl enhancing cream, mousse, or setting lotion
- Perm rods in various sizes
- Hair clips or hair ties
- Hooded dryer or diffuser attachment (optional)
- Lightweight hair oil or serum (optional)
- Light-hold hairspray or curl refreshing spray (optional)
Tutorial:
- Start with Clean and Damp Hair:
- Begin by washing your hair with a gentle shampoo and conditioner. Towel-dry your hair until it is damp but not dripping wet.
- Section your Hair:
- Divide your hair into sections using hair clips or hair ties. The number of sections will depend on the thickness and length of your hair. Smaller sections will give you more defined curls, while larger sections will create looser waves.
- Apply a Styling Product:
- Apply a curl enhancing cream, mousse, or setting lotion to each section of your hair. Make sure to distribute the product evenly from the roots to the ends.
- Select the Perm Rod Size:
- Choose the size of perm rod based on the desired curl size. Smaller rods will create tighter curls, while larger rods will give you looser waves. You can also use a combination of rod sizes for a more textured look.
- Wrap the Hair around the Perm Rod:
- Take a small section of hair and wrap it tightly around the perm rod, starting from the ends and rolling it towards the roots. Ensure that the hair is evenly distributed along the rod to create a uniform curl.
- Secure the Rod:
- Once the hair is wrapped around the perm rod, secure it in place by bending the ends of the rod or using a clip or hairpin. Make sure the rod is firmly attached to prevent the hair from unraveling.
- Repeat the Process:
- Continue wrapping sections of hair around perm rods until all of your hair is set. Take your time to ensure each section is neatly wrapped and secured.
- Allow the Hair to Dry:
- Once all the perm rods are in place, allow your hair to air dry completely. You can also use a hooded dryer or a diffuser attachment on a low heat setting to speed up the drying process. Avoid touching or disturbing the rods while your hair is drying.
- Remove the Perm Rods:
- Once your hair is fully dry, carefully remove the perm rods by unwinding them in the opposite direction of the curl. Avoid pulling or tugging on the curls to prevent frizz.
- Separate and Style:
- Gently separate the curls using your fingers or a wide-tooth comb to create the desired volume and shape. You can also use a lightweight hair oil or serum to add shine and reduce frizz.
- Set the Style:
- To help the curls last longer, you can mist your hair with a light-hold hairspray or apply a curl refreshing spray throughout the day for added definition and hold.
How to Remove a Perm Rod Set:
- Start with Dry Hair:
- Ensure that your hair is completely dry before removing the perm rods. Removing them while the hair is still damp can cause the curls to lose their shape.
- Apply Oil or Serum:
- Apply a small amount of lightweight hair oil or serum to your hands and gently run them through your hair. This will help reduce frizz and make the removal process smoother.
- Unwind the Rods:
- Starting from the bottom, carefully unwind each perm rod in the opposite direction of the curl. Avoid pulling or tugging on the hair to prevent unnecessary breakage.
- Separate and Style:
- Once all the perm rods are removed, use your fingers or a wide-tooth comb to separate and fluff the curls. You can also shake your head gently to loosen the curls and create more volume.
- Set the Style:
- If desired, you can use a light-hold hairspray or curl refreshing spray to set the style and ensure the curls last longer.
Remember, the key to maintaining your perm rod set is proper care and maintenance. Protect your curls while sleeping by using a satin bonnet or pillowcase, and avoid excessive manipulation that can cause frizz or disrupt the curls’ shape. With the right care, your perm rod set can last for several days, allowing you to enjoy beautiful and defined curls.